Create Business Phone System Plans / Product Bundling
Introduction
When using the QuoteCloud Telco plugin (Service Plan Contracts), you have the ability to create Service Plans. Service Plans are used to define a contract repayment plan for Phone Systems and Mobile phone sales. They provide the ability to automatically configure included Add-ons and optional Add-ons to a Service Plan. The Service plan also defines the contract term length, e.g. 12 months, or 24 months, etc.
Before you can start adding Service Plans, please ensure you have the Telco Plugin Activated. To learn how, please read the How to Activate the Telco Plugin user guide topic.
Let's get started!
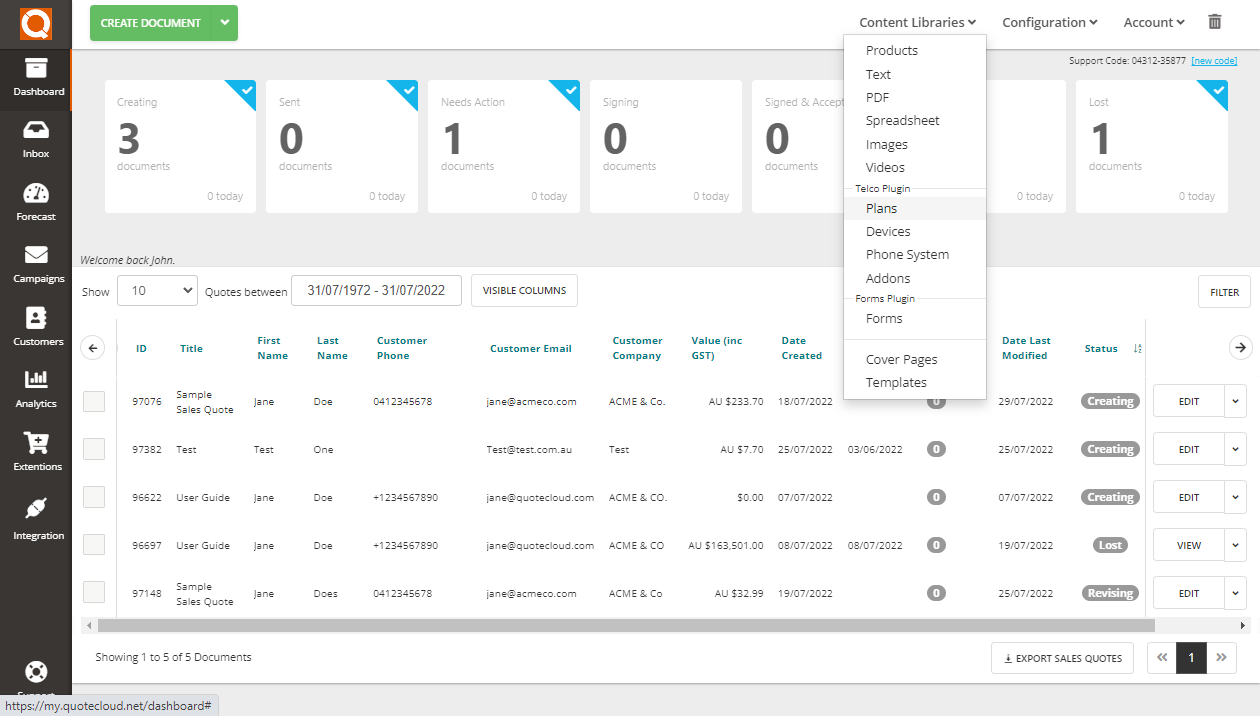
Click on the Content Libraries Menu, and select the option Plans menu option.

You will now see a list of existing Service Plans in your account (there may be no list of existing Service Plans if you are just starting your set-up). To create a new Service Plan, click on the New Phone System Plan button (bottom left of the page).

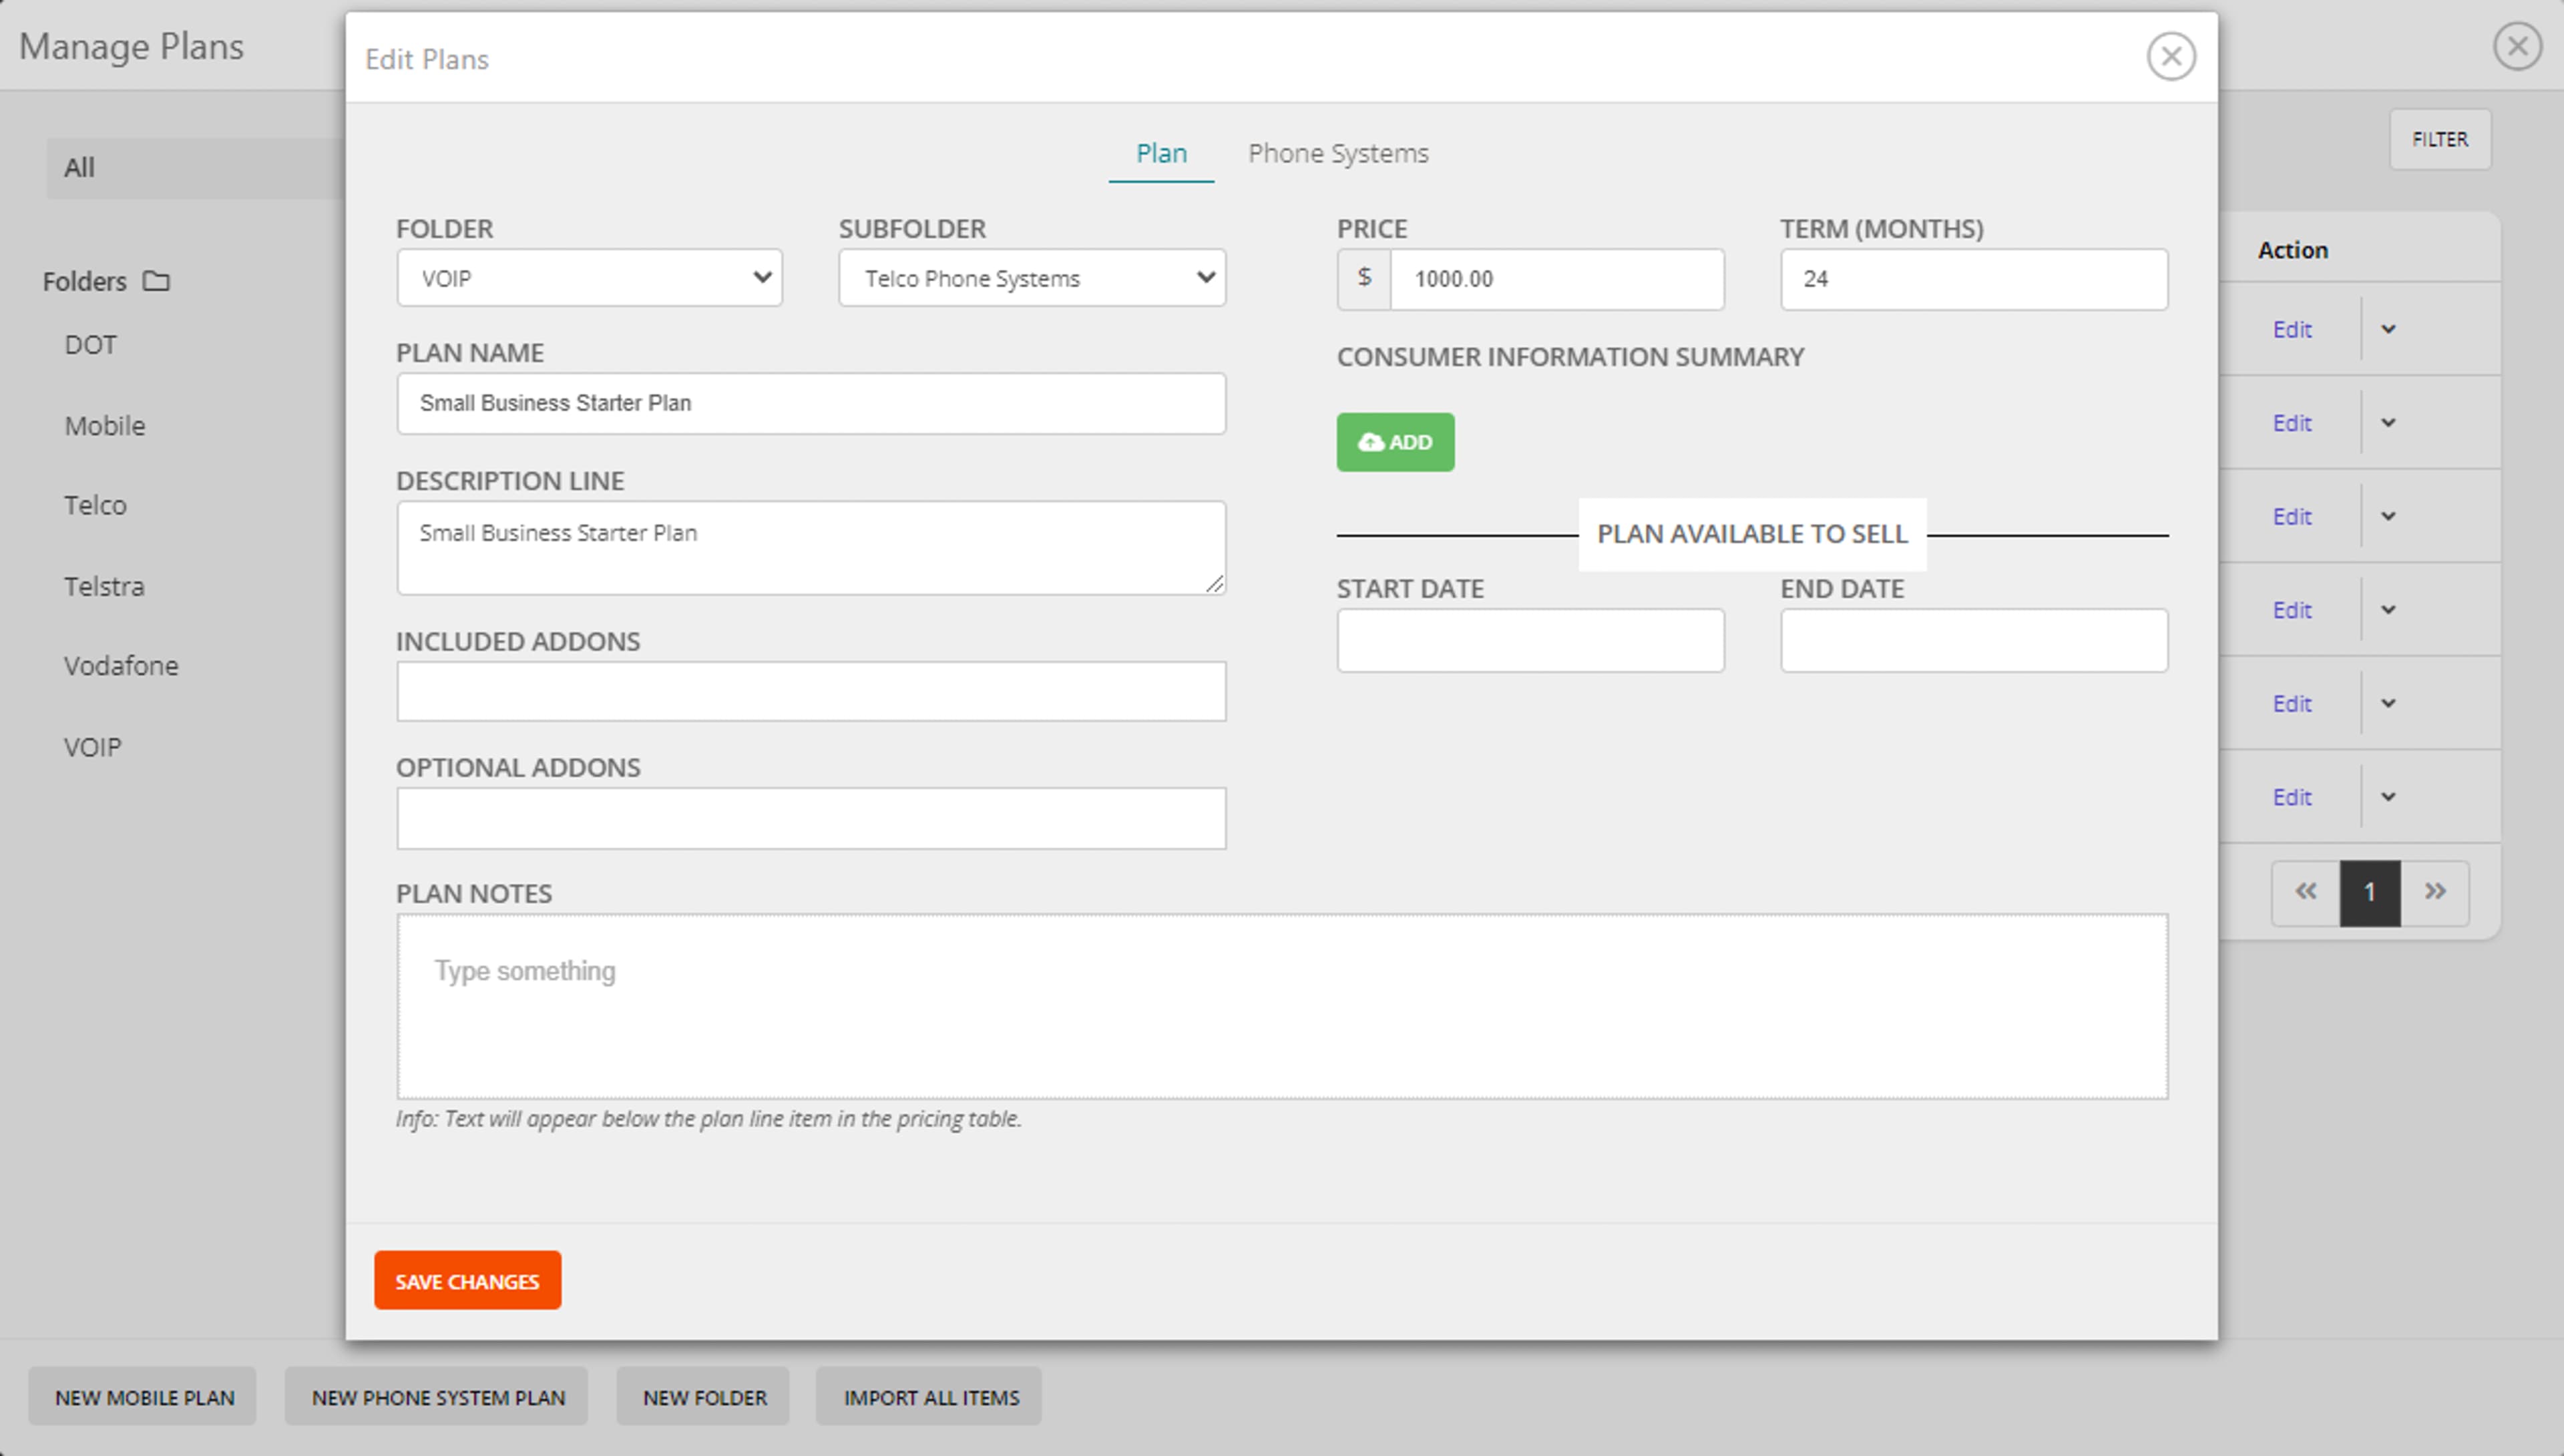
After you click on the New Phone System Plan button, you will see the Add Plans window appear, as shown below.

Click on the Device tab and fill in the required data for your new plan; the following is the explanation of each data item:
Folder (Required data field): This dropdown field will make you place your new plan into a folder category; you can create a new folder by clicking New Folder (bottom left of the screen). It is important to organize your data well, especially if you are going to create many plans. Think about how your data should be organized for the user. For example, if your a reseller of mobile phone plans for multiple telecommunications carriers, then perhaps use the name of the telco carrier to group the plans by the carrier
create a sub-folder
Item Name (required data field): The plan name is the name that appears to the sales consultant when they need to choose a phone contract plan to sell (when creating a sales quote in the Sales Quote Editor). Try to keep this name short and quickly informative to the Sales Consultant. Avoid long, cryptic, or difficult-to-understand language here, that may make it difficult for the Sales Consultant to understand when creating sales quotes;
Description Line (required data field): This is an essential data item; the text will appear on the sales quote line item. Make this user-friendly and accurate as it will appear on your sales quotes to customers and needs to be clear to a customer to understand which plan is being purchased;
Added Addons (optional data item): Click into this data field to choose from the available add-ons in this phone contract plan; for example, "unlimited international talk and text" could be an Add-on for a mobile contract plan. If you do not see any Add-ons, then refer to the user guide Creating and Managing Add-ons for more information.
The Add-Ons you allocate in the Included Addons data field will automatically be appended to the Phone Contract Plan when selected in a Sales Quote
Optional Add-ons (optional data item): Click into this data field to choose from the available add-ons that can be added to this Phone Contract Plan by the sales consultant when then add this phone contract plan to a sales quote, for example, "global data roaming" could be an add-on for a mobile contract plan. If you do not see any Add-ons, then refer to the user guide Creating and Managing Add-ons for more information
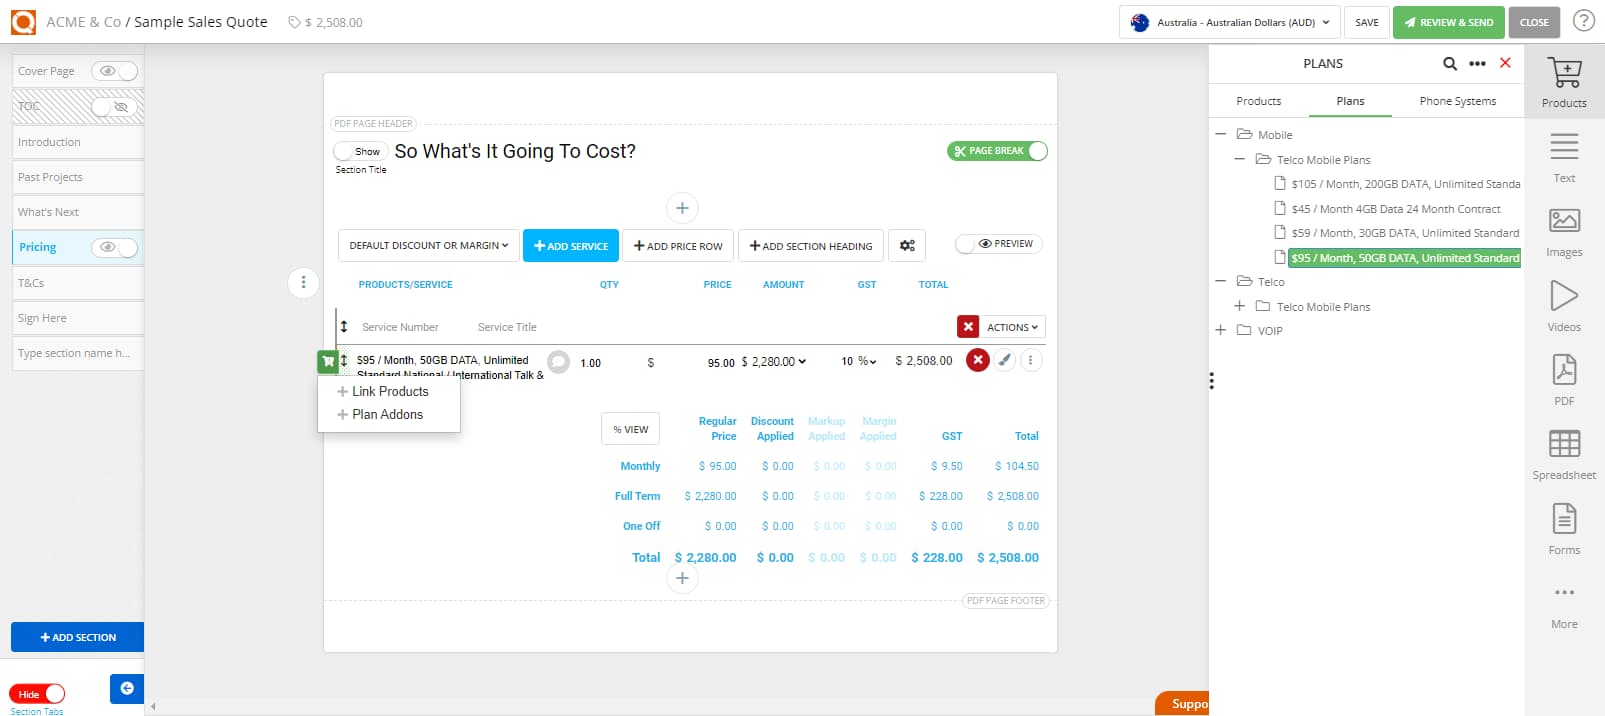
The Add-Ons you allocate in the Optional Add-ons data field will be available for the Sales Consultant to select when they click on the green tab on the left of the pricing table (when you hover on a line item that is a phone contract plan - as shown below).

Plan Notes (optional data item): Record important information about this Service Plan in this field; this information will appear under the price row line item (as shown below).
Price (required data item): this is the monthly price for your Service Plan.
Term (Months) (required data item): this is the duration of the contract measured in months; for example, if the contract term is 24 months, then type 24 in this data field.
Critical Information Summary (optional data item): you can upload a PDF file here, automatically added to all sales quotes using this Service Plan.
Start Date (optional data item): enter a start date that this Phone System Service Plan will be available for sale. If the start date is in the future, Sales Consultants will not see this plan when creating Sales Quotes.
End Date (optional data item): enter an end date that this Phone System Service Plan will be available for sale. After a Phone System Service Plan expires, it will no longer be available for Sales Consultants to use in Sales Quotes.
After completing all the information in the Plan tab, click on the Phone Systems tab to assign the phone system product pricing available with this Service Plan.

To allocate phone system products to a Service Plan, you must first create products in the Phone System Product Catalogue. Read the user guide topic for managing your phone system product catalogue for further information.
Click the Phone System tab.
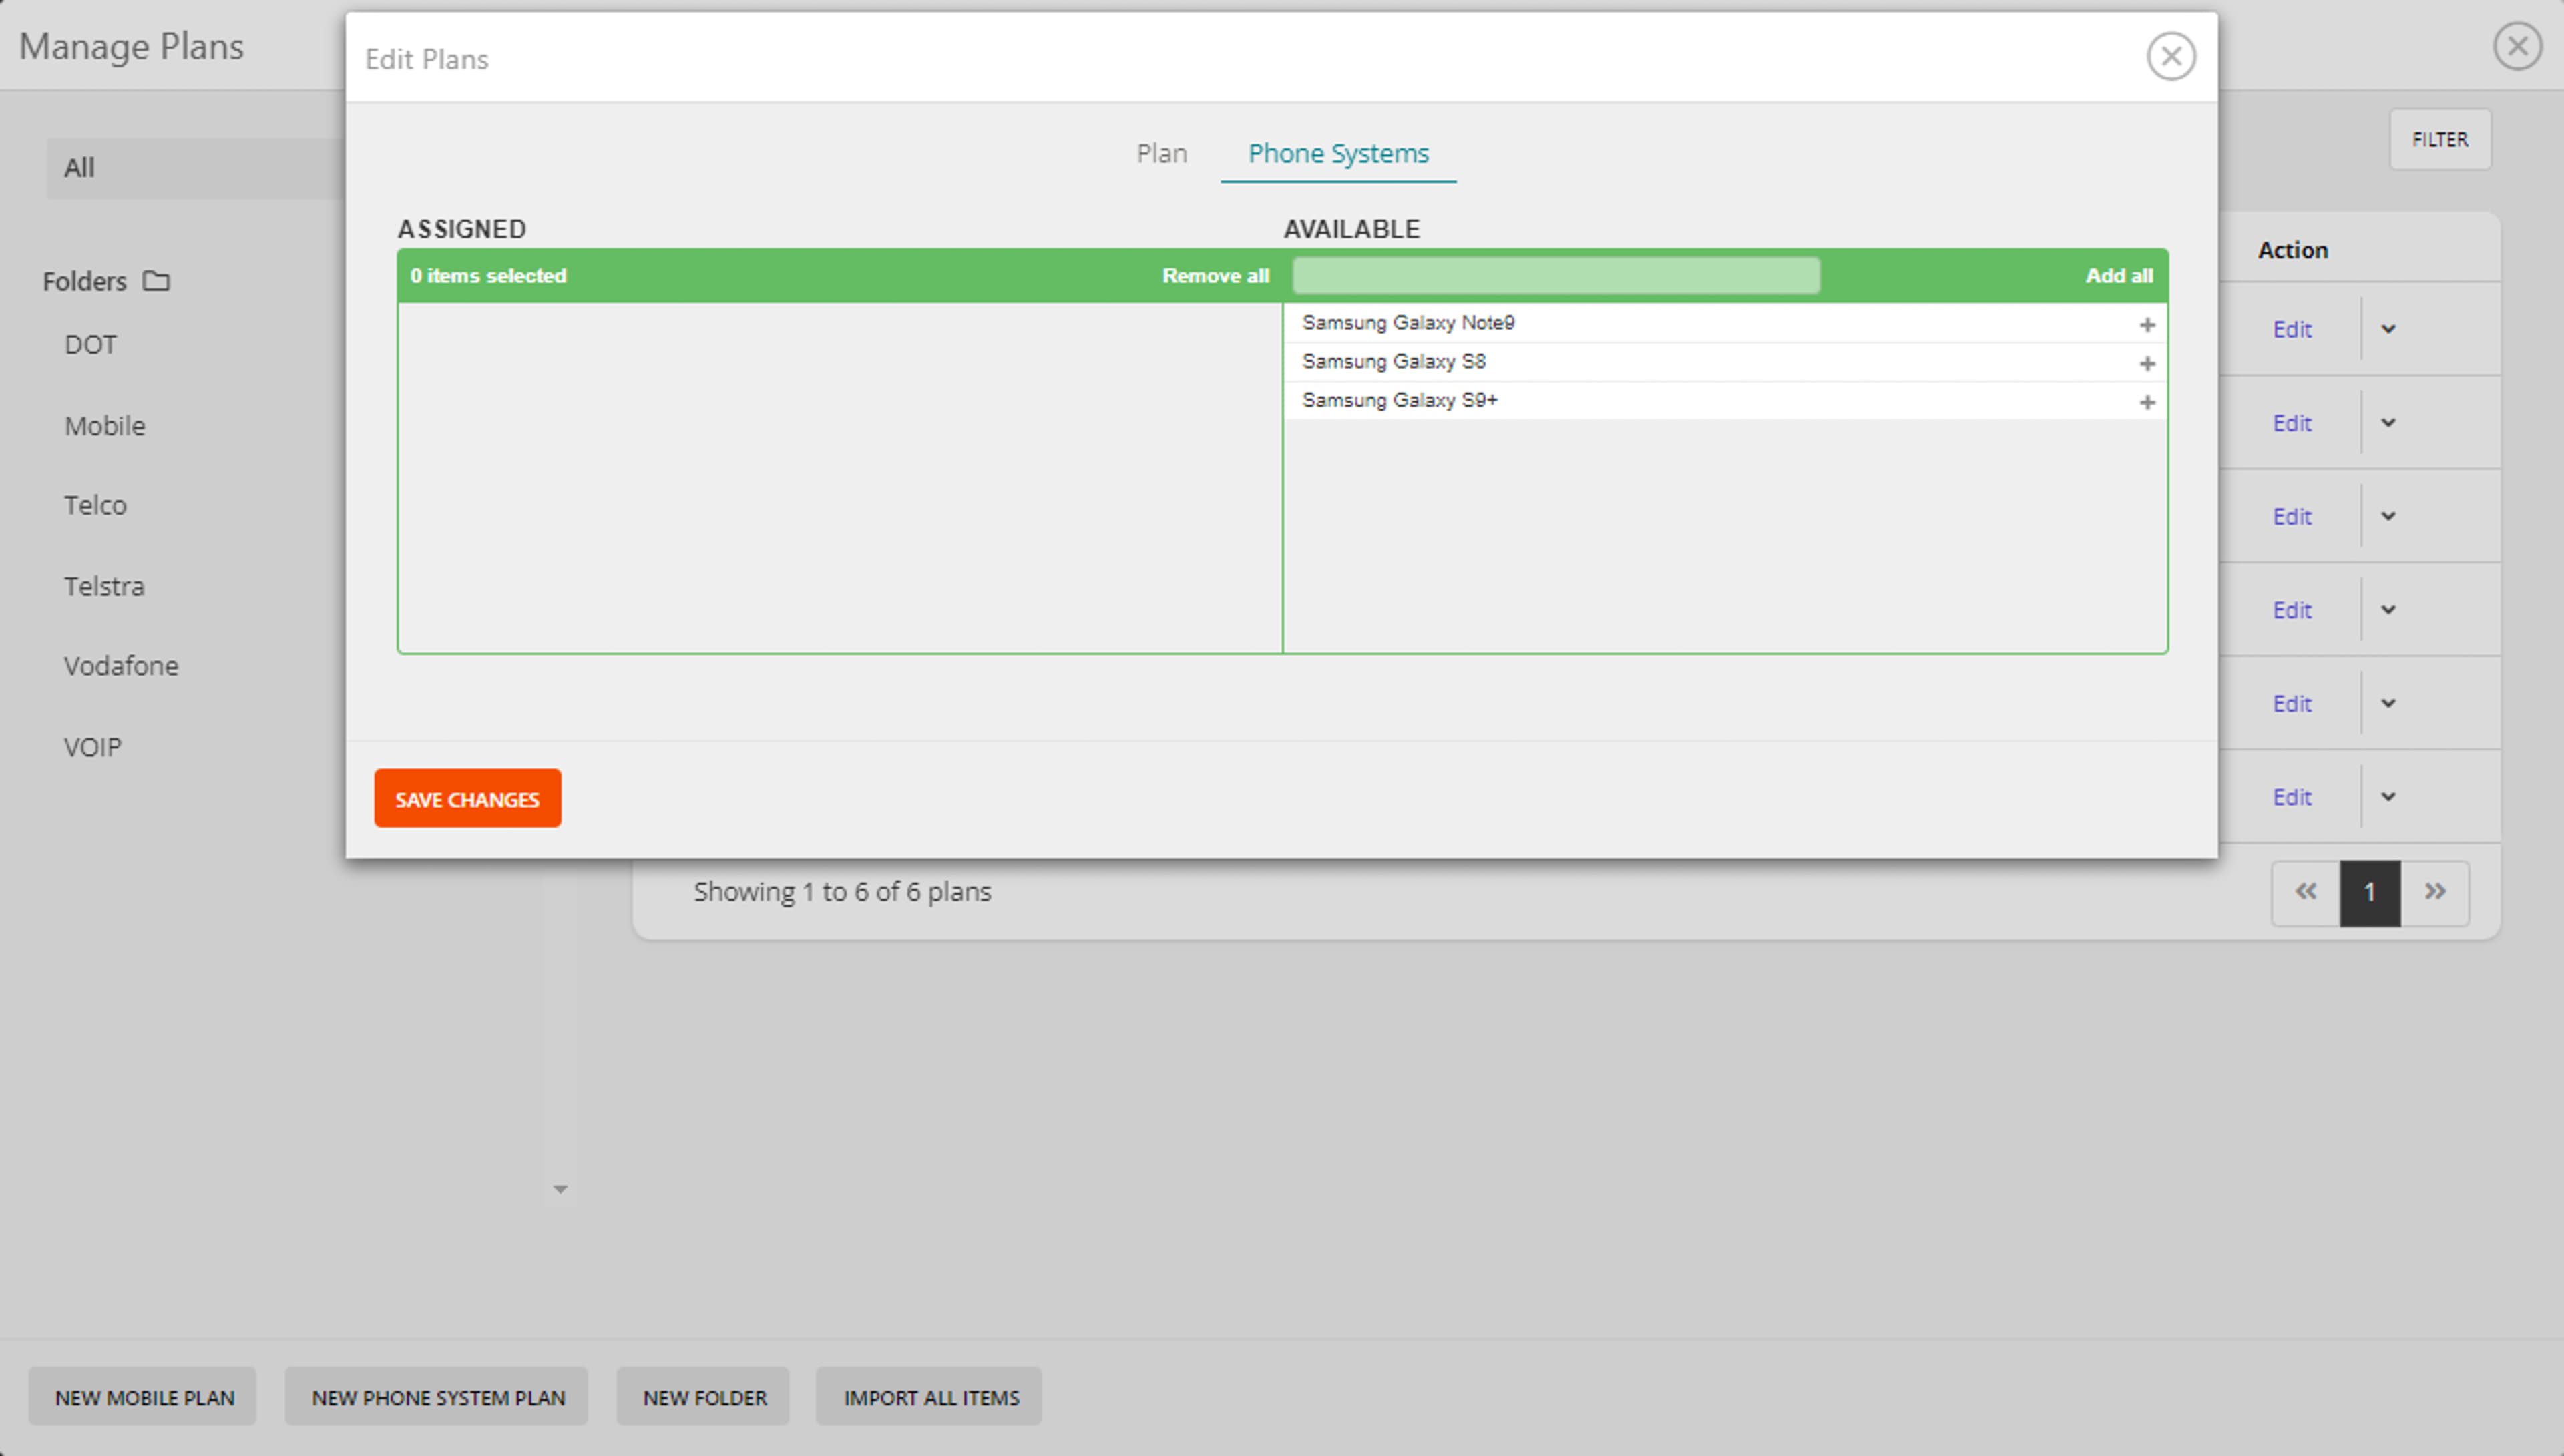
As shown below, you will see a table of two columns; on the right are all the available phone system products, and in the left column are the phone system products that have been assigned to this Service Plan.

In the Available column, locate a product you want to make available in this Service Plan with special pricing terms.
To reduce the number of products displayed in the Available list, you can use the filter feature in the keyword search field located above the Available list of products.
To add to your Assigned list, you can either click on the + (plus sign) on the right of the product in the Available list or click and drag the product from the Available list to the Assigned list.

After you assign a product to the Assigned list, you will see the product pricing data displayed.
You can now click on each price term (e.g. 12, 24, 36 months etc.) to adjust the pricing of this product when sold with this Service Plan.

Repeat the process above until all the phone system product prices are set correctly for this Service Plan.
After all products are assigned, click on the Save button to update the Service Plan.
Related User Guide Topics


