Making a Data Item Mandatory (*)
Some input fields in a form may be required when a sales quote recipient approves your sales quote. This user guide explains how to make an input field mandatory before a sales quote can be approved.
First, start by adding a form to a sales quote in the Sales Quote Editor.
Click on the + button located between every content block while working in the Sales Quote Editor and then select Form at the very bottom.
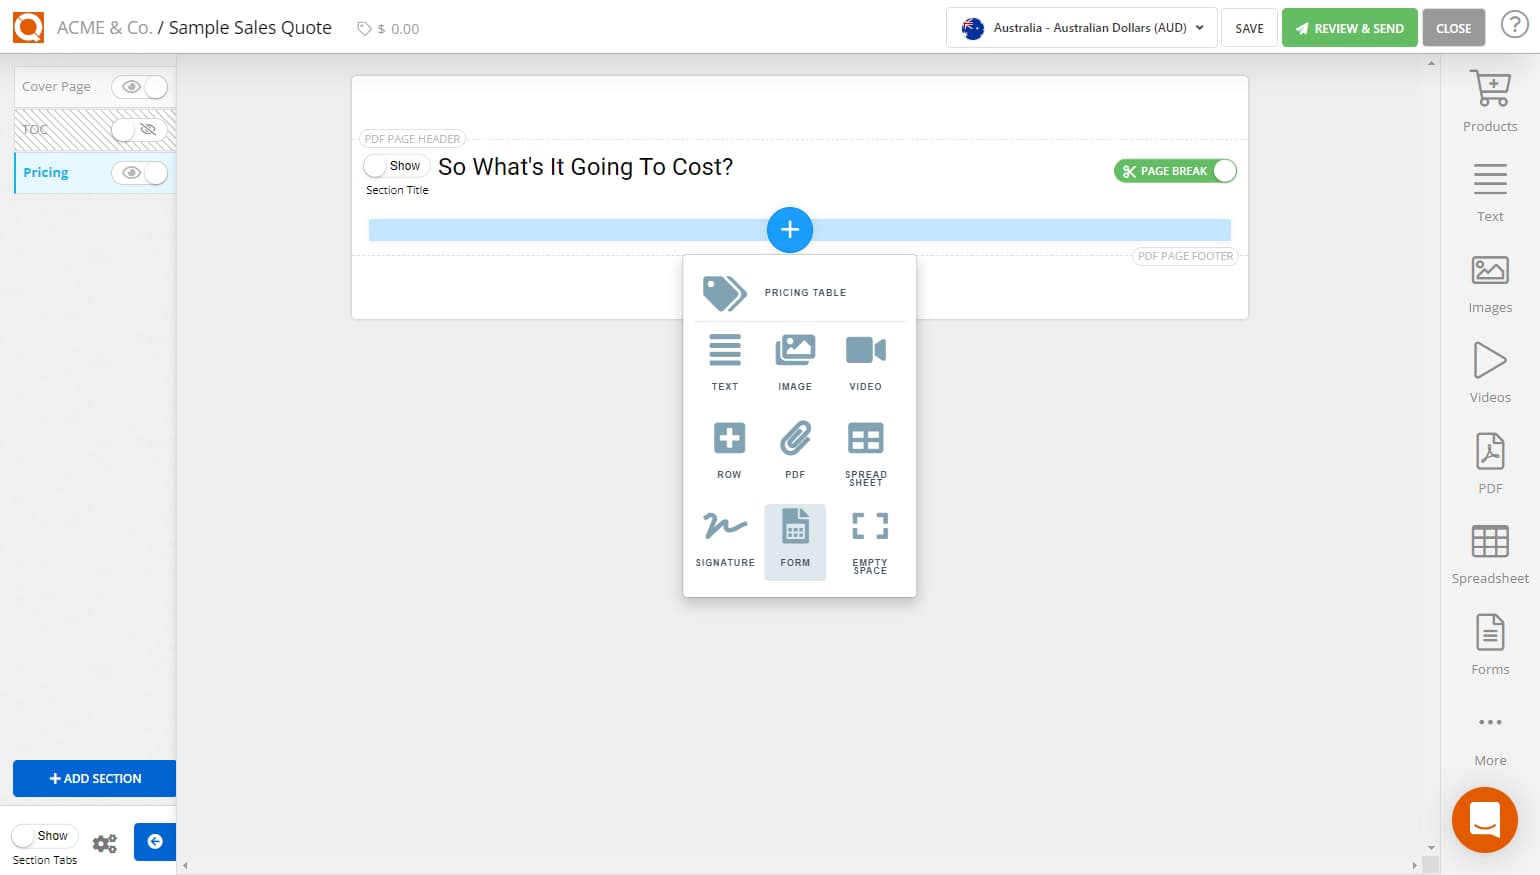
A new form block will be added and a content editor toolbar will appear at the top of the Sales Quote Editor.
To begin inserting a data field onto a form within a field set, click on the Add Field button located between every content block while working in the Sales Quote Editor.
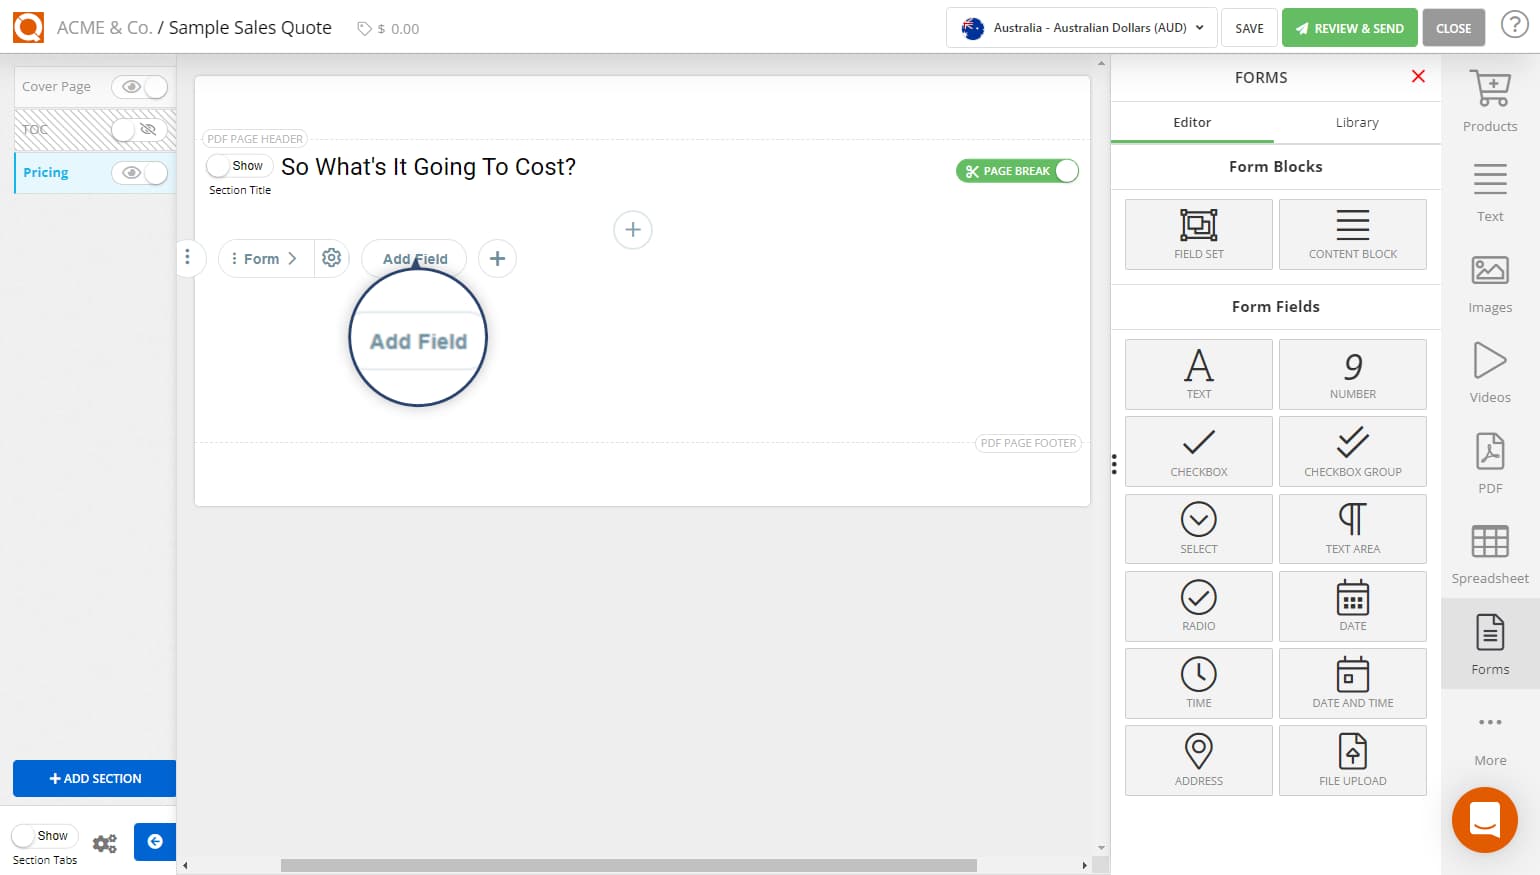
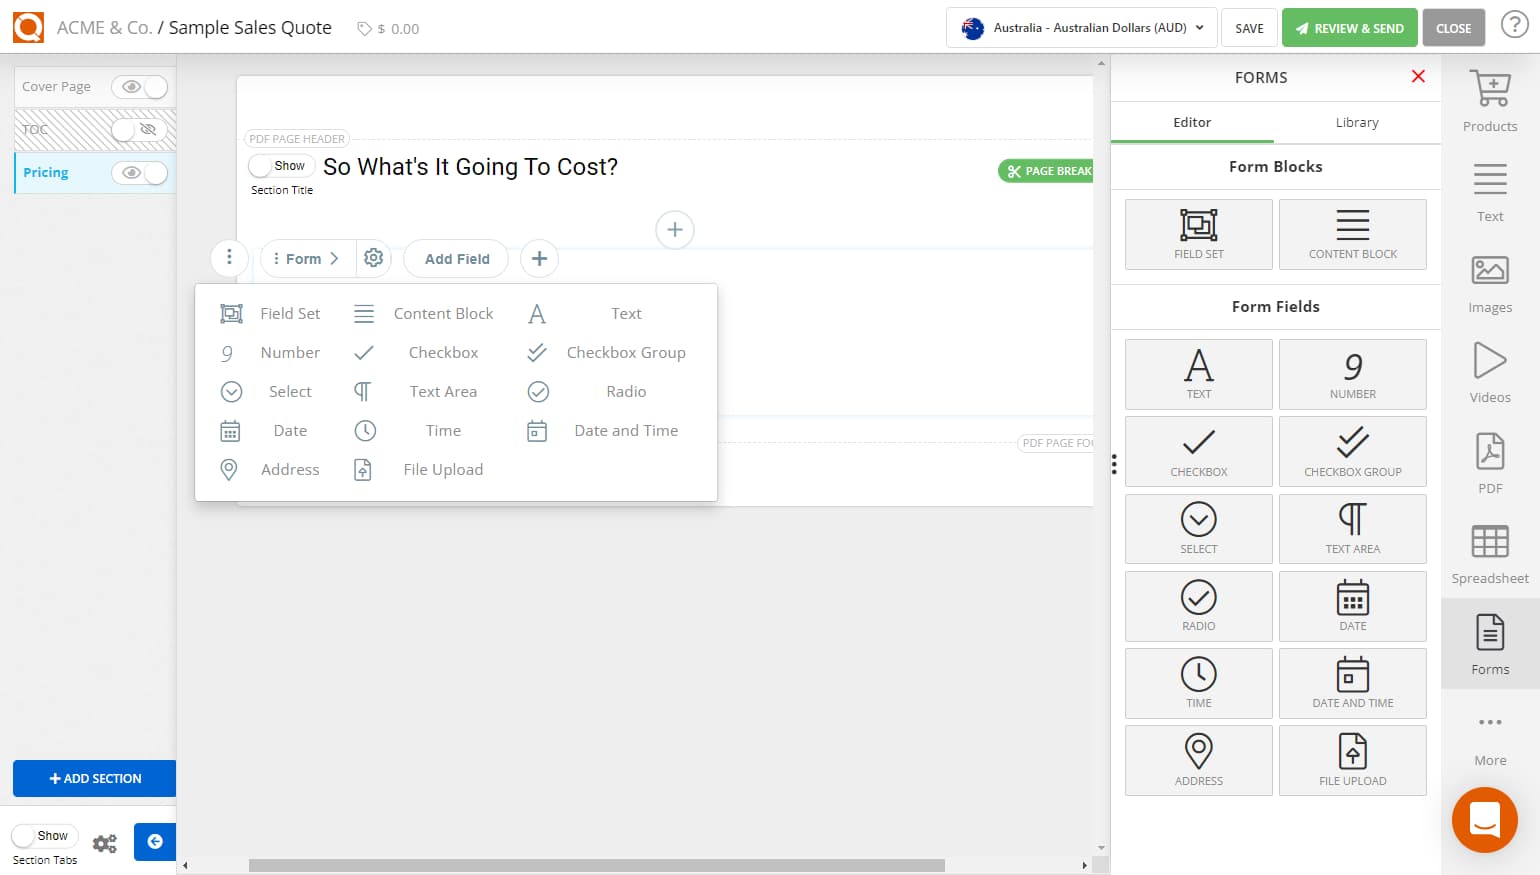
A selection box will now appear, as shown below. You can also select from the slide-out options if you click Forms on the right hand banner.
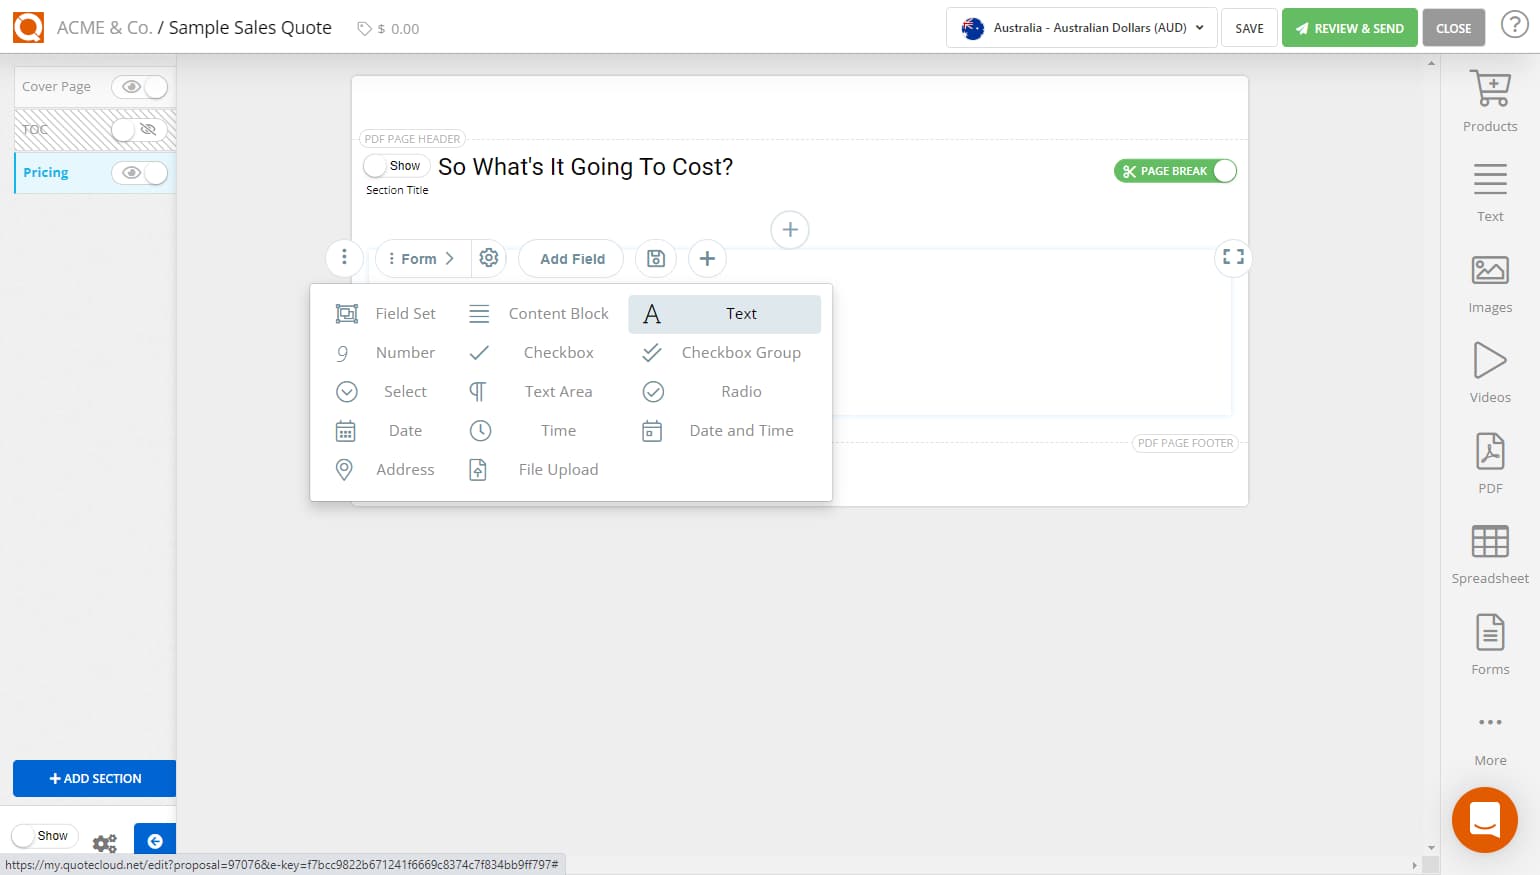
This selection box will display the available types of input data fields that can be inserted into a form. These are:
FieldSet - used to group a set of input fields to allow columns of input fields to be configured, and also allow multiple sets of data to be added by the sales quote recipient, e.g. enter the first name, last name, gender of students attending a course, the form would be required to allow multiple students attending.
Content Block - a text block added inside the form to provide the sales quote recipient instructions when completing a form.
Text - alpha/numeric "text" input field type
Number - numeric values only
Checkbox - a single tick box, e.g. "tick here to accept our terms and conditions"
Checkbox Group - a list of options where the sales quote recipient can select more than one option
Select - a drop-down list of values where a sales quote recipient can select a value
Text Area - an alpha/numeric input field type that allows more than one line of text, e.g. a comments input field in a form
Radio - a list of options where the sales quote recipient can only select one value from the list
Date - date value, with a calendar popup
Time - time value - with a time (clock) selector popup
Date and Time - Date and time input field with calendar/time selector popup
Address - address input field type
File Upload - The file upload feature will allow sales quote recipients to attach files to a form they submit when completing a form
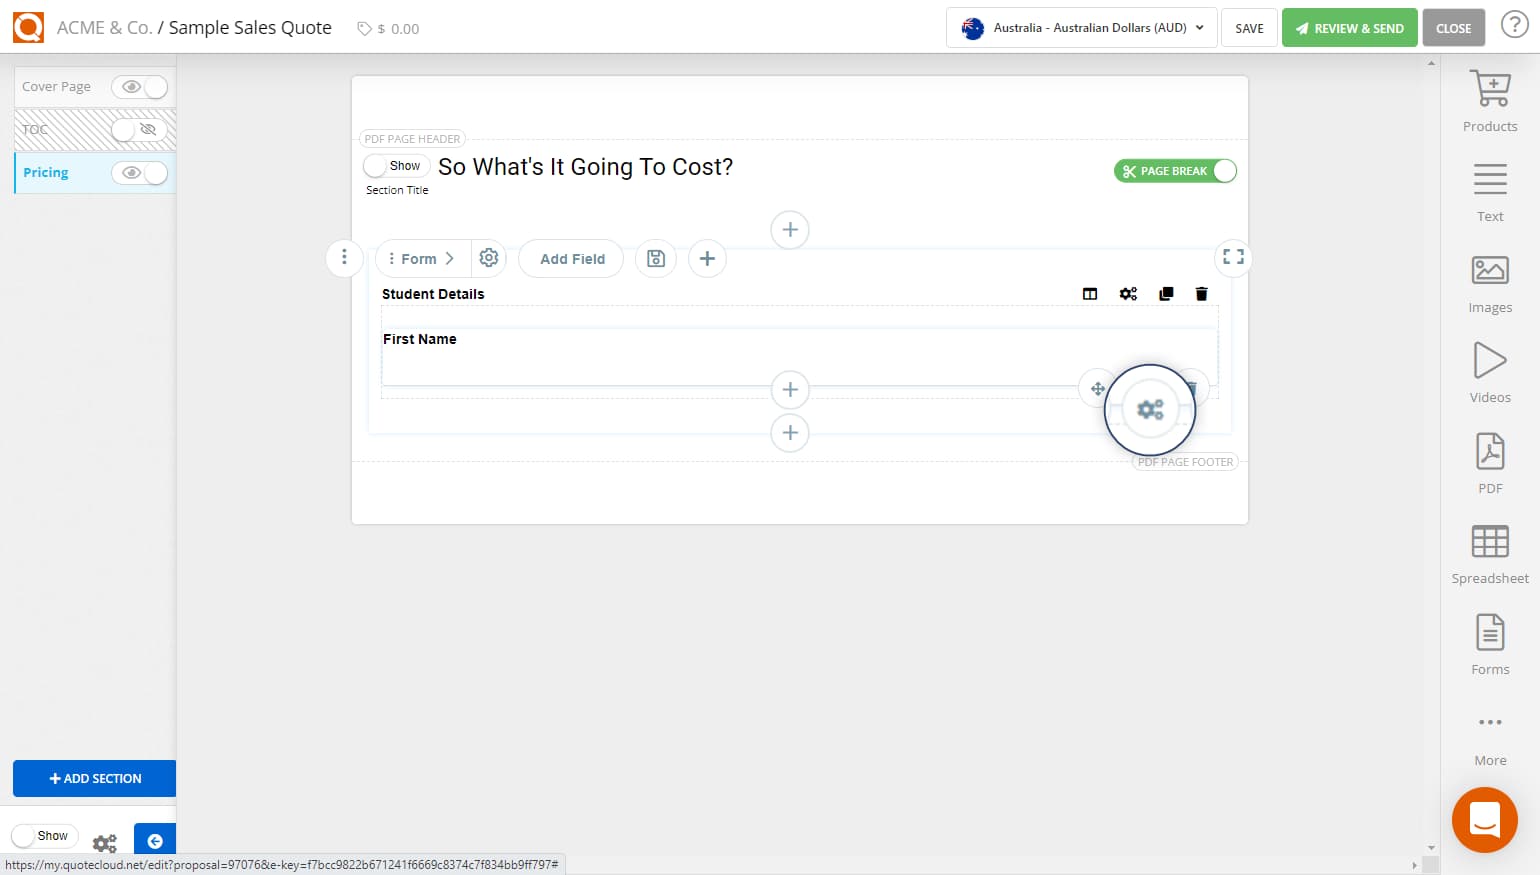
After inserting an input field, the sales consultant can adjust the label of the input field by clicking on the Text label. Overtype the default label that appears with a suitable label for your input field; for example (as shown below), the text label has been changed to First Name.
To change the field to mandatory, click on the Settings cog button for the relevant fields.
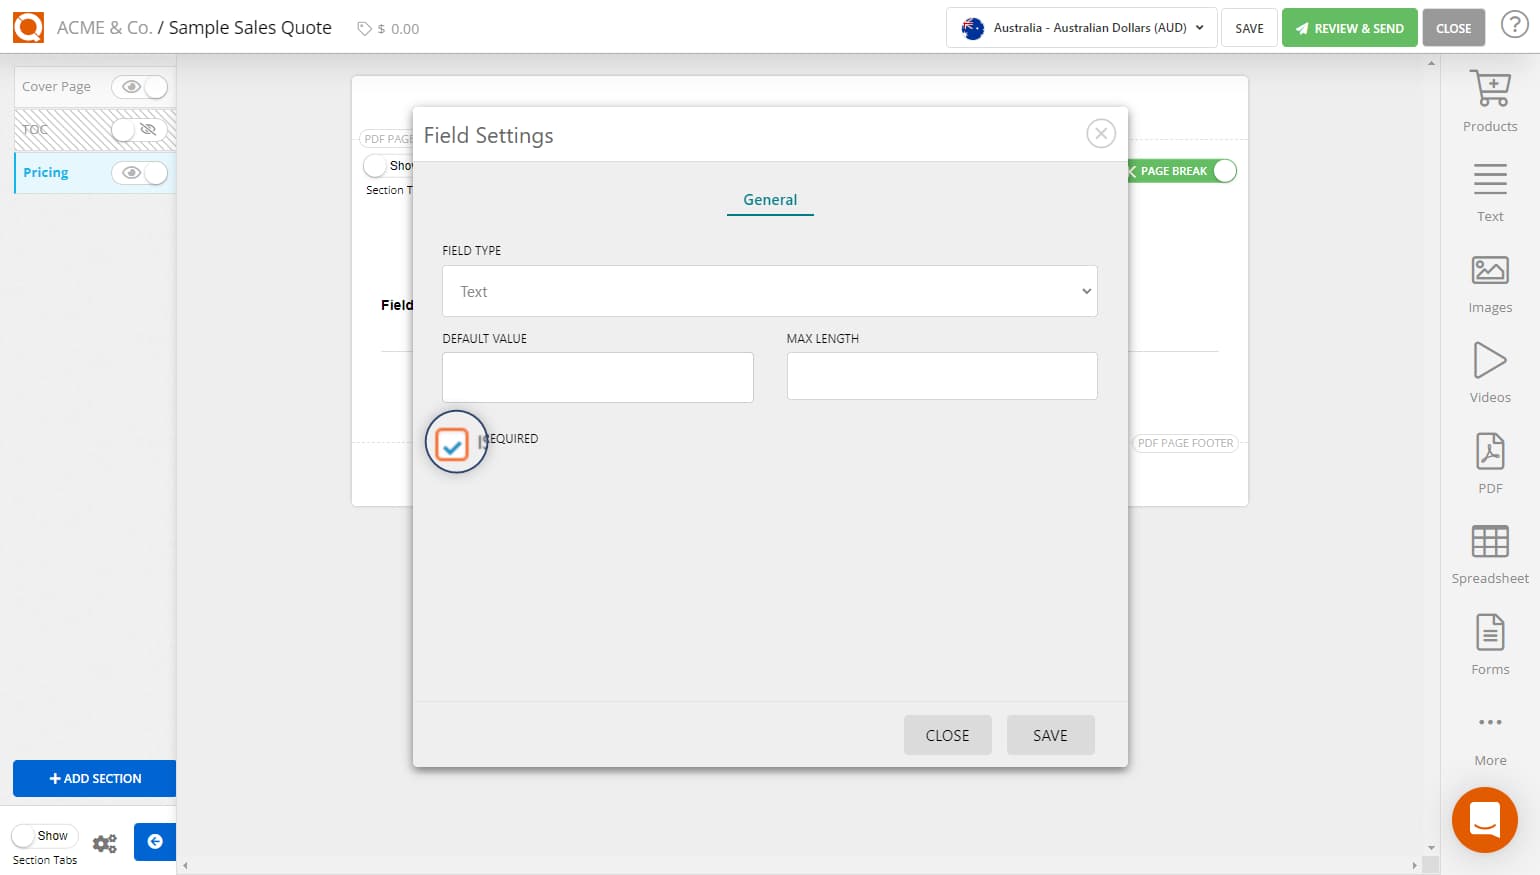
Here you can restrict the field inputs and also check the Is Required box and click Save.
Related User Guide Topics


