How To Personalise The Default Email Content For Sending Documents
When emailing sales quotes to your customers, QuoteCloud will load a default email subject line and message.
The default email content is loaded automatically, to help save time when sales consultants are sending or revising a sales quote. The default email settings are set at a company settings level, however can be personalised in each sales consultants account. A Sales Consultant may want to personalise their default email content to add their own style or simply add their own email signature.
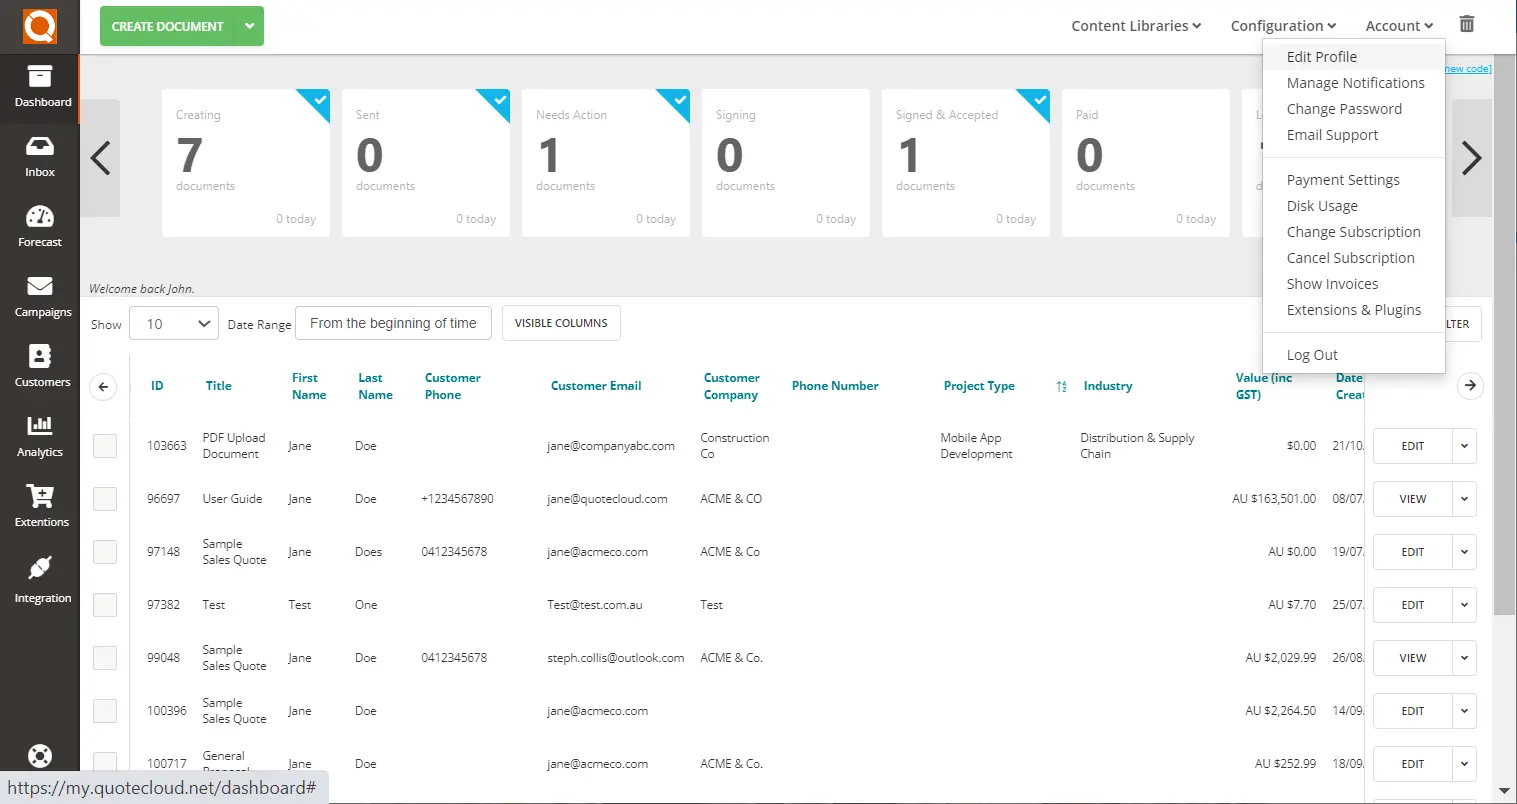
To update the default email subject and message in your personal profile, select Account > Edit Profile.

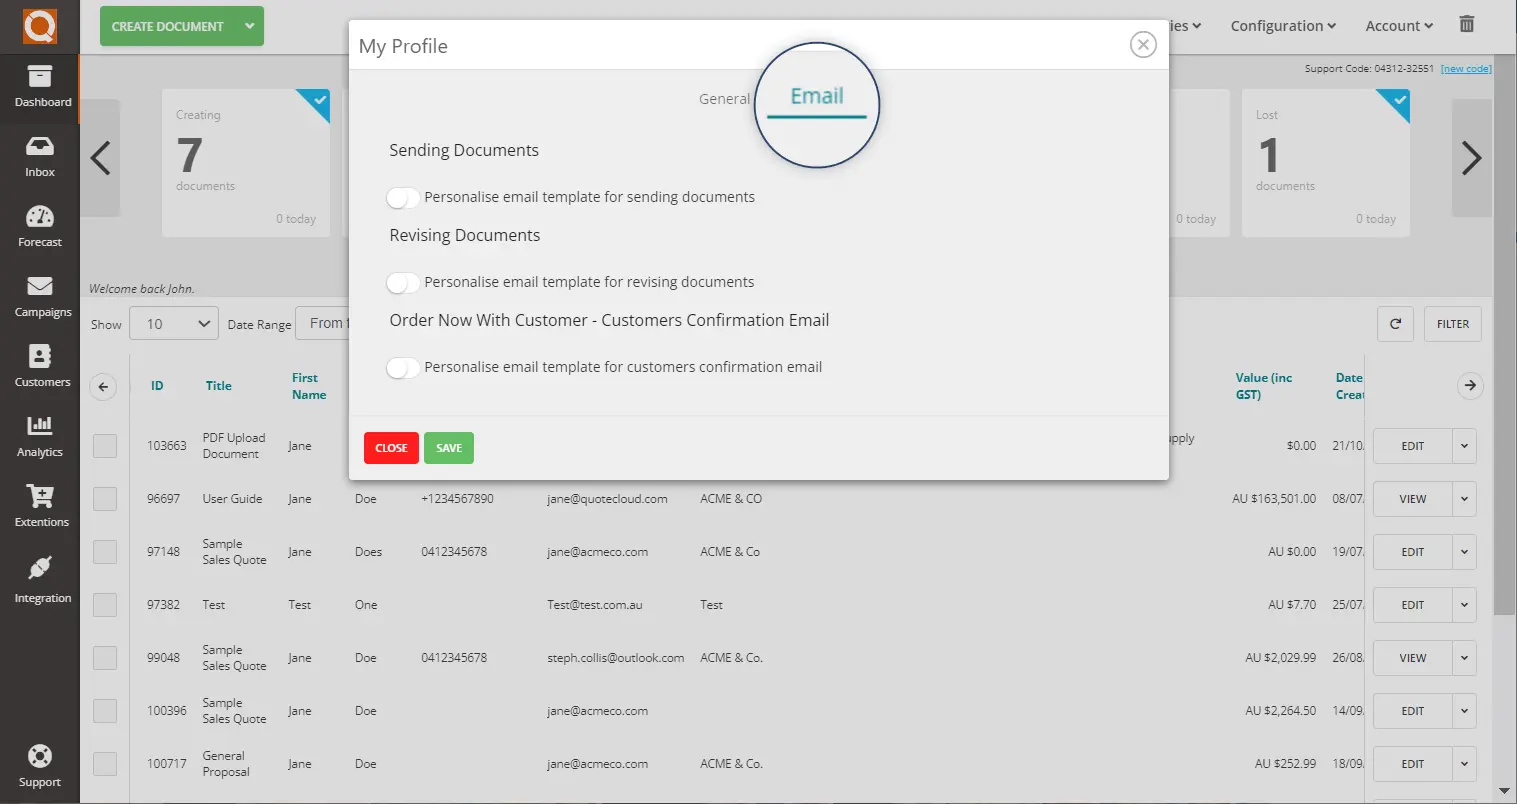
Once in the Edit Profile Settings, click on the Email tab. This section has pre-drafted content for the following types of emails that can be sent through QuoteCloud:
- Sending Documents
- Revising Documents
- Order Now With Customer - Customers Confirmation Email
The pre-drafted content can be set at a company level and will be used as the default content for all emails sent through QuoteCloud. But to provide your customers with a more personalised experience, you are able to customise the email content for your own profile to help match your tone of voice and contact details etc.If all toggles are shown to the left and displayed as white, this means that the content being used is the company level default content.

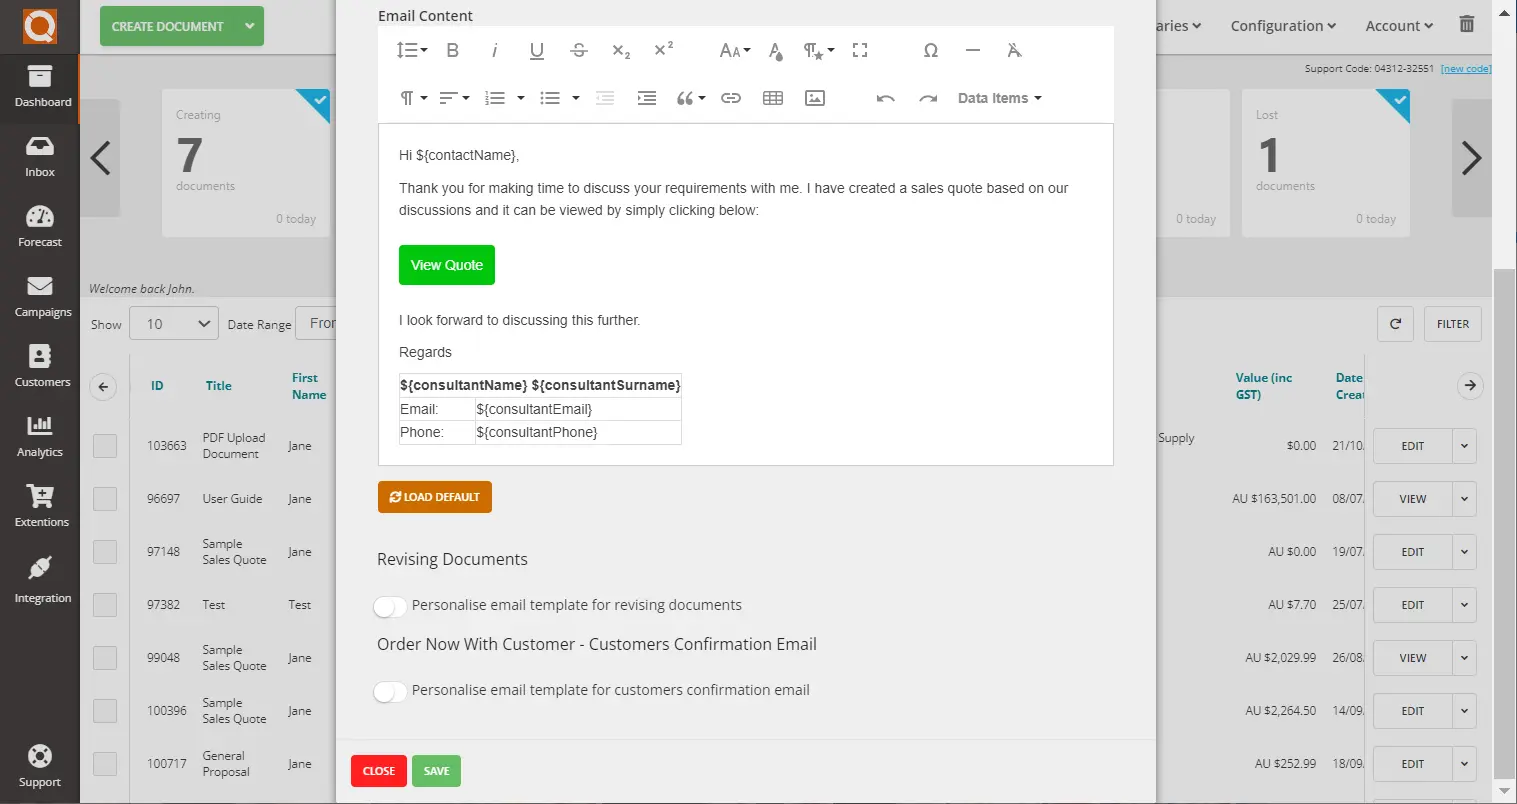
By switching the toggle to the right (will display green when active), this will open the editable content section.
As we are wanting to change the default content for sending documents, we need to switch the first toggle.
To edit the email content, you can either copy and paste from an existing email template and adjust, or format a new one in the content editor in the Email Company Settings.
It is recommended that the merged data fields (e.g. ${consultantEmail}) are utilised as much as possible as this allows for QuoteCloud to automatically input the relevant consultant / sales team member's information in place before sending the email to a customer.

Be sure to scroll down to the bottom and click Save to keep your changes.

Related User Guide Topics


